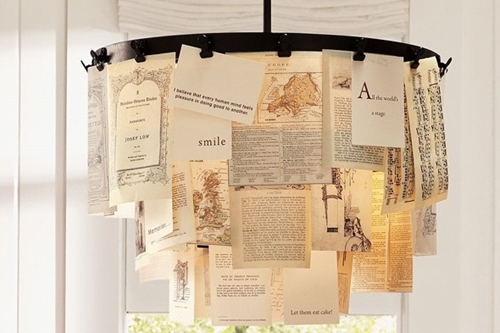
The lighting in your home can make a big impact on the overall tone and mood of a room. Lighting that’s too harsh can create unwanted shadows, but a subtle glow can warm up the atmosphere for a welcoming ambiance. There is one overlooked material that can be used to soften the lighting in a room, and that’s paper. Here are a few of my favorite DIY projects that you can use to help light your home:
Paper chandelier
Not sure what to do with all those holiday cards or birthday cards that you’ve received in the mail? Use them to create a stunning chandelier. Use a simple pendant light as the base of your chandelier, then wrap 2- to 3-feet of wire around the pendant. Secure the wire around the pendant using pliers, and attach black paper clamps on the wire. Put all of your cards into the paper clips for a decorative light source. If you don’t have any cards to attach to your chandelier, you can use other paper sources, like pages from an old book, drawings, magazine pages or love letters. As you receive cards in the mail, you can add them to your chandelier.
Paper luminaries
Give life to the front of your home with some paper luminaries. Use lunch-sized paper bags that can be found in the craft store and opt for a brightly colored bag or a shiny metallic for a sophisticated look (metallic hues lend well to a modern style). Decorative hole punches or craft knives can be used to carve fun designs like stars or stripes into the bag – I’m personally a fan of floral patterns. Once you’ve decorated the bag according to your personal style, fill the luminary with sand and a battery-powered tea light to ensure that it doesn’t blow away outside. The light from the candle will shine through the pattern to cast a beautiful pathway of light. You can line up the bags on your front porch or place them on the edges of the walkway leading up to your home.
Paper lanterns
Cover a paper lantern with circles of colorful tissue paper to create a light fixture that is filled with bright hues and texture. Use small squares of double-sided tape to attach the tissue paper around the lantern. Try overlapping the paper to create a fluttery finish – it should end up looking similar to an upside down flower. You can also use white paper cupcake liners on your lantern to produce a graphic print (I always have extra liners lying around my kitchen). Place a dot of hot glue on the bottom of each cupcake liner and press them onto the lantern until they stick.
You can also use cupcake liners to create your very own set of stringed lights. Choose liners that are patterned or colorful to bring some personality to your light source. Then slice an “x” at the bottom of the liner so you can push through one of the bulbs from your string of white lights.

